Brutus Monroe MASK-arade Blog Hop

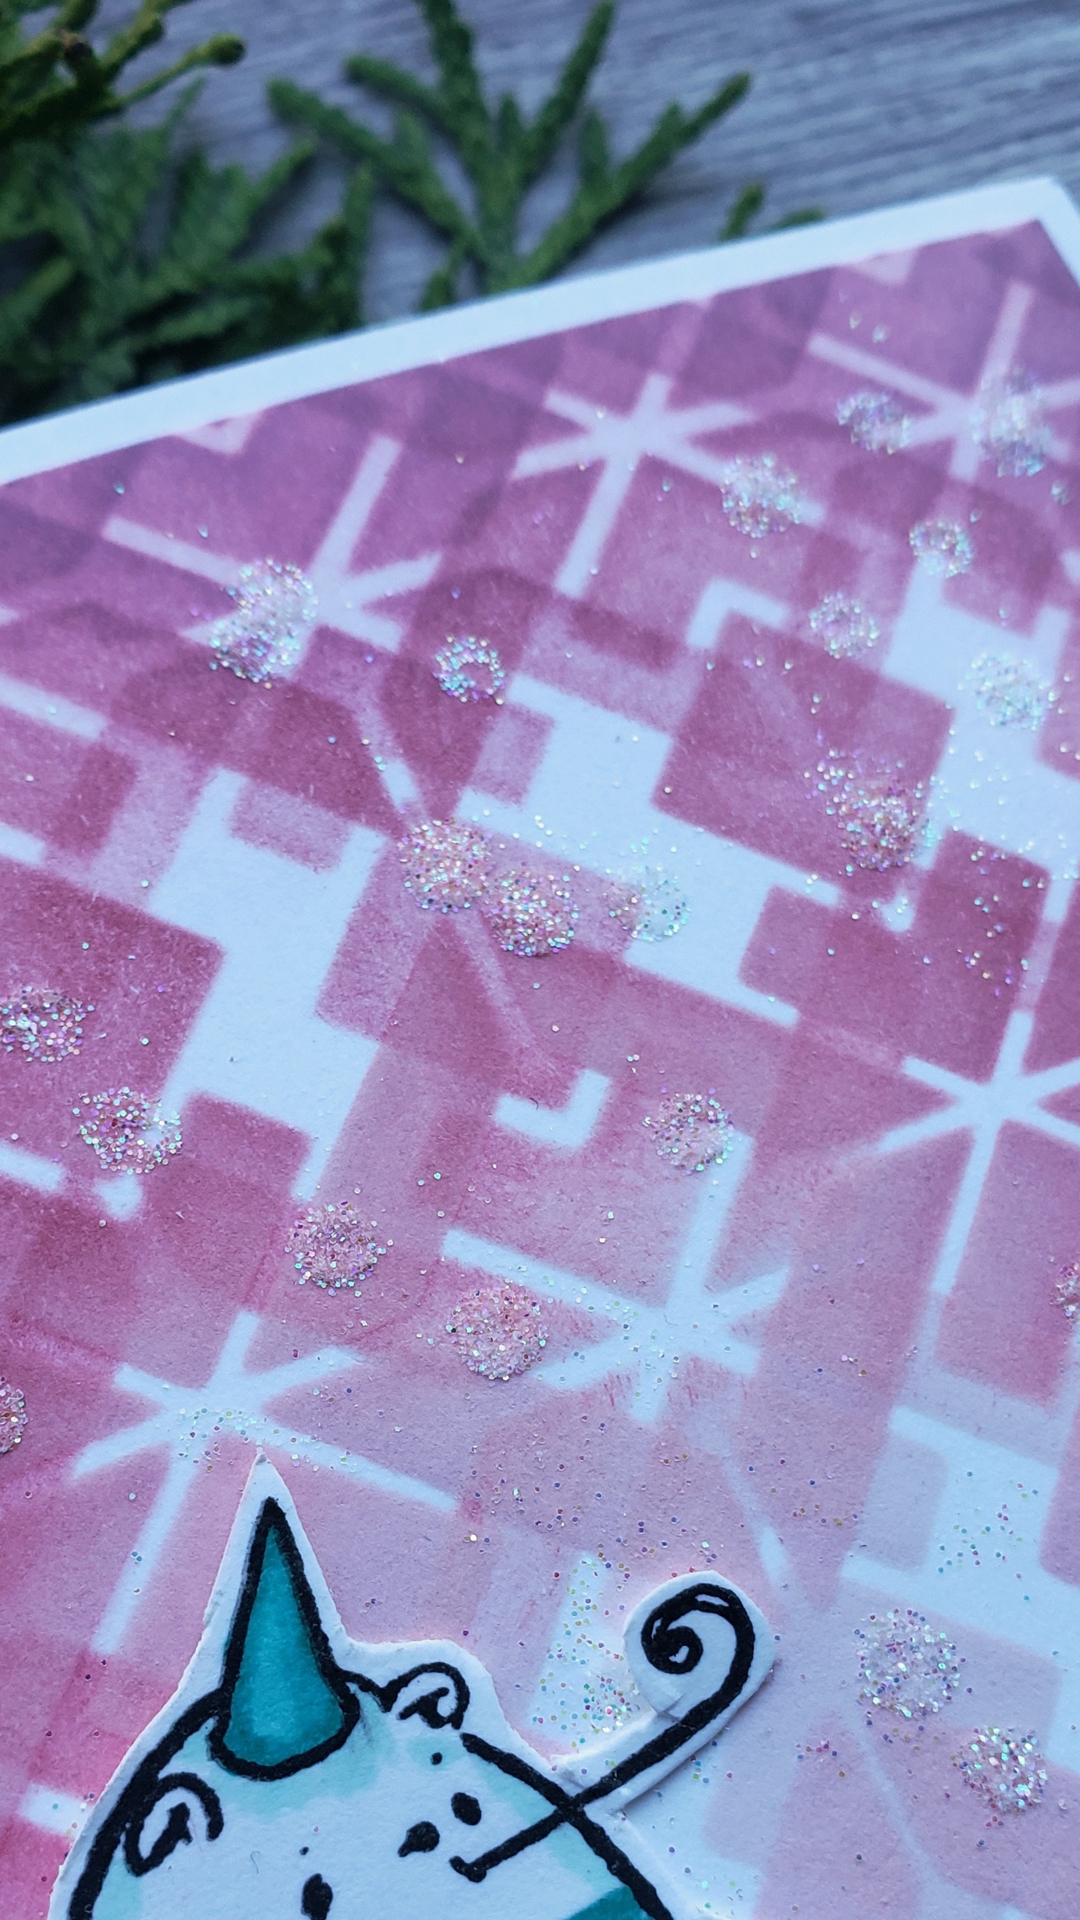
Welcome to my post for the MASK-arade blog hop! Masking brings your stamping game to a whole new level!!! You can make one dimensional stamp images appear to have depth as well as create scenes you wouldn’t otherwise be able to create without masking.

For my card today I used the Birthday Bear Stamp Set from Brutus Monroe, some regular copy paper for masking and some Copic markers to make this little card sing happy birthday.

Brutus Monroe Birthday Bear Card by Daniel West

Brutus Monroe Birthday Bear Card by Daniel West

To begin, I cut down a panel of Bristol Smooth Card Stock to about 3.75 by 4.5 inches. I placed it in my MISTI and stamped the bear with balloons image using Raven Detail Ink. Then I stamped it again on a piece of regular copy paper and cut out the image of the bear to create a mask. I placed the mask of the image of the bear and carefully placed the stamps of the rabbit and the other bear with a cupcake on either side of the first bear. I inked them up with Raven Detail Ink and stamped them over the top of the mask. When I removed the mask, these two appear to stand behind the first bear.


Brutus Monroe Birthday Bear Stamp Set Masked together by Daniel West

Brutus Monroe Birthday Bear Stamp Set Masked together by Daniel West

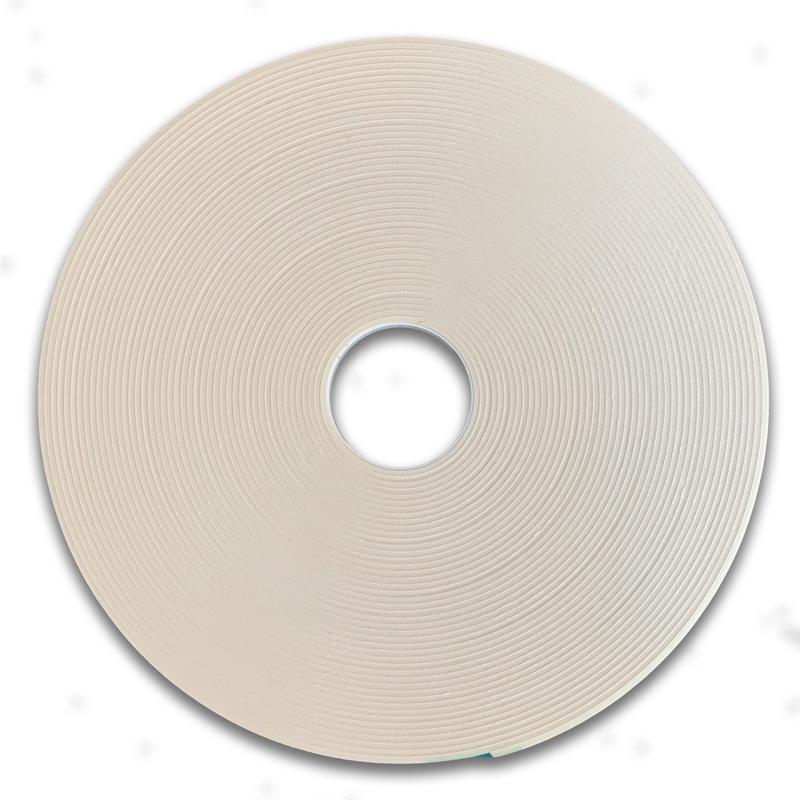
I chose an earth tones palette (E colors) for the bears and rabbit and reds (R colors) for the balloons, gift and cupcake. I drew some horizontal lines and shadows under the little critters and stamped a sentiment from the set: “Got Cake?”. I just love the magic of masking. To finish off the card, I popped up the center panel on some foam tape and backed it with some red card stock from my stash. I adhered this panel to an A2 size card base I cut out of a sheet of Neenah Solar White 110lb card stock.

Layered and popped up panel by Daniel West

Layered and popped up panel by Daniel West

I’d love to hear what you think of this card in the comments below.

I have included links to the supplies I used for this card below. Affiliate lnks help me keep this blog running and at no additional cost to you! If you use my links to make a purchase, please let me know and send me your address in an e-mail at delandartie@gmail.com. I will send you a card in the mail.

Thanks for being with me today and please hop along to see what everyone else on the Brutus Monroe Inspiration Team has created today.

Brutus Monroe Color Crush - Cozy Christmas Blog Hop

Welcome to my post for the Brutus Monroe Color Crush - Cozy Christmas blog hop! This week our inspired leader, Marie, has challenged us to use a specific color pallette with which to design our masterpieces: Marsala, Rouge, Honeysuckle, Sea and Oz.

Cozy Christmas Color Pallette

Cozy Christmas Color Pallette

After choosing my inks, I took out the November Stencil of the Month and some fresh ink blending sponges and began to ink up a 4.25 x 5.5 inch panel. Starting in the center I blended the Honeysuckle out to the Rouge, then the Marsala in from the outer edges of the panel toward the center.

I lifted the stencil and moved it horizontally about 1/4 of an inch to the right and started the process over. This made for a dreamy, ethereal background of cranberries and pinks.

Brutus Monroe November Stencil of the Month 2018 by Daniel West

Brutus Monroe November Stencil of the Month 2018 by Daniel West

I wanted to use a stamp set that I just received last week from Brutus Monroe called Birthday Bears. For this winter scene, I made one of the bears a polar bear and I added a sweater to him with the Sweadda Weadda background stamp and some a Copic marker.

Brutus Monroe Birthday Bears Stamp Set with Sweadda Weadda by Daniel West

Brutus Monroe Birthday Bears Stamp Set with Sweadda Weadda by Daniel West

I added some snowy hills using parchment paper from my wife’s kitchen stash. I used it instead of vellum, because I did not need to heat emboss it and I wanted thinner more fibrous layers to make up the snowy hills. For this card, I used four sheets, wrapping them around the back of the panel and gluing them down with B|M All-Purpose Craft Glue.


B_M Cozy Christmas Colors.jpg

I grabbed the B|M Lower Case Alphabet Dies and cut out the word ‘joy’ from some Tutu Glitter Paper from Concord & 9th. I adhered the letters to the bottom right of the card panel. Then I glued down the bear image to the front of the parchment paper.


B_M Cozy Christmas Colors (1).jpg

I dotted the entire front of the card with a DecoFoil Adhesive Pen and poured some B|M Sparking Snowflake Glitter over the panel. When I shook of the excess glitter, it left behind a beautiful shimmer, especially on the dots of adhesive.

To anchor the bear with the sentiment, I grabbed three snowflakes I had die cut for a previous card using the Wintry Edges Die from Concord & 9th. I glued them between the bear and the sentiment and finished the card by adhering the panel to a Neenah Solar White A4 card base.

NOTE: How exciting to see Simon Says Stamp showcasing Brutus Monroe in this week’s Monday Challenge. So, I also made this card for the Simon Says Stamp Monday Challenge . You could win $50 to spend at Simon Says Stamp!!! #delandartie #dudescrafttoo #sssmchallenge #brutusmonroe #createyourownending

I hope you enjoyed this card and will continue on the blog hop. I have listed supplies below for your convenience. These are affiliate links. When you purchase something after clicking on my links, I will receive a portion of the purchase at no additional cost to you.

Thank you for stopping by!


And check out the amazing projects my friends on the B|M Inspiration Team created with this Cozy Christmas Color Pallette this week.

HEATHER 

DANIEL (you are here)

BERINA

LAUREN

JESSICA

ASHLEY


Brutus Monroe Glitter Glaze Blog Hop

Welcome to my post for the Glitter Glaze blog hop! My post will not include BM Glitter Glaze, unfortunately. Let me explain. I ordered the wrong thing from the B|M Store. And when I realized my mistake, it was too late to get the right product. So I improvised by making my own glitter paste mixing equal parts Mod Podge Extreme Glitter and Aleene’s Tacky Glue with some fine blue glitter I had in my stash. I paid $11 for these supplies. A jar of B|M Glitter Glaze costs only $6.99, and comes already formulated, mixed and in a resealable jar!!

For my first attempt at using a (homemade) glitter glaze, I was very pleased with the results.

Glitter Glaze Project for Brutus Monroe by Daniel West

Glitter Glaze Project for Brutus Monroe by Daniel West


After mixing the glaze, I laid out an A2 panel of Neenah Solar White card stock and taped down the B|M Kaleidoscope Stencil over it. I used a spatula to spread the glaze over the top and then lifted the stencil off. I put the panel aside to dry and in a few hours returned to it.

Brutus Monroe Kaleidoscope Stencil and Glitter Glaze by Daniel West

Brutus Monroe Kaleidoscope Stencil and Glitter Glaze by Daniel West

I took a Lawn Fawn Stitched Rectangles die and cut out a smaller portion of the panel. I cut a piece of silver card stock I had in my stash a little larger than the glazed panel. I used a We R Memory Keepers Corner Chomper to round the corners of these two panels. Then, I adhered the glazed panel over top of the silver panel with some B|M All-purpose Craft Glue.


Silver Card Stock Panel with Rounded Corners by Daniel WEst

Silver Card Stock Panel with Rounded Corners by Daniel WEst

I glued these to the front of an A2 sized card base I made from Neenah Solar White 110lb card stock and rounded the corners of the card base, too. To tie these elements all together, I cut a band of dark blue card stock to one inch and layered it over some parchment paper. Then I stamped and a holiday sentiment from my stash with B|M Embossing Ink on the same colored card stock. I heat embossed it with B|M Alabaster Embossing Powder and my Wagner Heat Tool. I layered it on top of a piece of parchment paper, as well, then adhered it to the front of the panel.

Brutus Monroe Alabaster Embossing Powder by Daniel West

Brutus Monroe Alabaster Embossing Powder by Daniel West

I hope you enjoyed this little project. B|M has this fantastic Berry color available in Glitter Glaze and you still have time to get it before Hanukkah.

Glitter Cards (5).jpg

What’s your favorite color of Glitter Glaze? Let me know in the comments below.

I have used affiliate links throughout this post. When you use them, I receive a small percentage of your purchase at no additional cost to you. Go get some Glitter Glaze now at Brutus Monroe!

And check out the amazing projects my friends on the B|M Inspiration Team created with Glitter Glaze this week.

MARIE

HEATHER

JESS

LAUREN

BERINA

DANIEL (you are here)

ASHLEY

WALESKA


Honey I Shrunk the Film Blog Hop

Hello everyone and welcome to my part of the Honey I Shrunk the Film Blog Hop featuring Brutus Monroe Premium Shrink Film. Shrink Film debuted in my home this week. Until now, I had never heard of this fantastic and fun product that kids have played with for years.

B|M Premium Shrink Film

B|M Premium Shrink Film

To make my Shrink Film Embellishment Snowmen, I stamped five snowmen from the B|M Snow Friends Stamp Set onto a sheet of B|M Shrink Film using B|M Raven Detail Ink. I did not color them in until after baking them. I fussy cut them out with a pair of Mini Snips and placed them on a piece of wax paper to bake them. I watched Marie Heiderscheit’s YouTube live where she “baked” hers with a Wagner Heat Tool. I tried that method and the oven method. I have to say that the oven was much easier than the heat tool for me. I just heated my toaster oven to 350º F and turned on the convection function for good measure and they shrunk right down in about 10 seconds.

Shrink Cards (2).jpg

When they finished shrinking, I let them cool for a moment and colored them in with a Cricut Silver Marker. These markers layed down a very opaque color and covered over the detail of the snowmen. So I took out a Tombow Mono Drawing Pen size 0.1 and redrew the faces and tummy buttons.

Then I used an orange Copic marker to color in the nose and a green one to color in the gift box on each snowman.

Shrink Cards (1).jpg

For the background, I chose the B|M Snowflake Stencil and did some ink blending with Distress Oxide Inks: Seedless Preserves and Picked Raspberries. I taped down a piece of 110 lb Neenah Classic Crest Card Stock to my Glass Mat by rolling up and flattening a small piece of painter’s tape to the back of the panel. Then I taped down my Snowflake Stencil over the top of the panel and used an Ink Blending Tool to blend the two inks together over the top of the stencil.

I trimmed down this panel to about three inches and glued it to the front of a 4.5 x 5.25 inch Neenah Classic Crest card base. To keep the snowmen from getting lost in the snowy background, I inked up a strip of scrap card stock with Seedless Preserves Distress Oxide Ink and trimmed it down to about a half inch. I grabbed a piece of B|M Heat Resistant Vellum and trimmed it down to just about 3/4 inch to adhere to the back of the inked strip. Then I glued them both down to the stenciled card panel using B|M All-Purpose Craft Glue.

Shrink Cards (3).jpg

The snowmen fit perfectly in a line going across strip. I glued them down with the B|M All-Purpose Craft Glue, as well. I chose five, an odd number, because, in design, odd numbers of items are more pleasing to the eye. (Thanks Ashley Tucker for teaching me this principle).

Shrink Cards (4).jpg

To finish off the card, I stamped HAPPY BIRTHDAY on the bottom right using a sentiment from the B|M Sharon’s Script Stamp Set in B|M Rouge Surface Ink.

I hope you enjoyed my card for this blog hop. If you would like to purchase any of these products, I have used affiliate links through this post for your convenience. At no additional cost to you, you can purchase using these links, and I receive a small percentage of your purchase to help me continue to bring amazing content your way.

Also, the list of supplies is available here in a list:

Brutus Monroe Premium Shrink Film

B|M Snow Friends Stamp Set

B|M Snowflake Stencil

B|M Raven Detail Ink

B|M Heat Resistant Vellum

B|M All-Purpose Craft Glue

B|M All-Purpose Craft Glue

B|M Sharon’s Script Stamp Set

B|M Rouge Surface Ink

Tim Holtz Mini Snips

Wagner Heat Tool

Cricut Silver Markers

Tombow Mono Drawing Pen

Orange Copic Marker

Green Copic Marker

Distress Oxide Inks

110 lb Neenah Classic Crest Card Stock

Tim Holtz Glass Mat

Ink Blending Tools

This is the end of the blog hop today, but if you started with me, here’s the navigation list. Please visit the rest of our team members’ posts to see their amazing creativity on display using the B|M Shrink Film.

BERINA

HEATHER

MARIE

JESS

LAUREN

ASHLEY

WALESKA

DANIEL (you are here)

Brutus Monroe Shake It Up Blog Hop

Welcome to the Shake It Up Blog Hop by the Brutus Monroe Inspiration Team. The theme for this week’s hop has us shakin’ it up!! I have to admit, when I first saw shaker cards, I thought I would never do one. I found them a little novel and at the same time, daunting. But then I made one and became hooked!!! Something about shaking a card with bling behind a tiny window brings a smile to my face. Now I find them fascinating. With the right tools, you can make one in no time!

For my card, today, I chose for the background, the B|M Rose Garden Stamp. I stamped the image on to a piece of Neenah Classic Crest Cardstock using B|M Raven Detail Ink. This ink plays well with alcohol markers or watercolor when dry, so I heat set the ink with my Wagner Heat Tool and began to color it in with six Copic markers: R24, R46, and R69 for the red roses and E08, YR04 and Y15 for the yellow ones.

After coloring in the roses, I took out some rusty orange cardstock I had in my stash and cut out the center of it using my Stitched Rectangle Dies from Lawn Fawn. I trimmed it down to fit the size of the card and cover the colored panel below it. Then I took my background stamp and inked it up with some B|M Clear Embossing Ink and stamped it twice to cover the outer window panel. The window frame was too large for the stamp, so there was a small gap left where the sides of the stamped image meet on the frame. So I grabbed my Ranger Perfect Medium Brush Pen and connected the lines between the two stamped images to fill in the empty space. (Can you tell where the two sides actually meet?)

Rose Garden Shaker (5).jpg

I adhered a piece of acetate from one of my stamp sets to the back of that window and popped it up on some B|M Foam Tape. For the bling inside the shaker window, I added some fall-colored Flat-Back Pearls from the B|M Autumn Inspiration Box. The Foam Tape raised the window up to just the right height, so that the half pearls would not flip over in the window when shaken. PERFECTION!

Rose Garden Shaker (3).jpg

Then, I found a piece of vellum in my stash and stamped the same Rose Garden Stamp on it with B|M Clear Embossing Ink. I poured some B|M Alabaster Embossing Powder over the top of it and melted it with my heat tool. Then I trimmed out the image of one of the roses and adhered it to the side of the window frame with some B|M All-Purpose Craft Glue. For the sentiment, I pulled out the B|M Botanical Banners Stamp Set and stamped the I LOVE YOU banner onto some Neenah Classic Crest cardstock using B|M Maple Surface Ink. I fussy cut the banner out and glued it onto the front of the rose embossed vellum.

Rose Garden Shaker (2).jpg

To finish off the card, I adhered the shaker top to a card base I made from Neenah Classic Crest 110lb cardstock.

I dedicate this card to my precious wife who loves me so well. I LOVE YOU PAULA!

My entry finishes out this blog hop today! Please let me know, in the comments below if you plan on making a shaker card, too! You should definitely consider using Brutus Monroe’s big momma roll of Foam Tape!! Last night, B|M Released Heat-Resistant Vellum, too… better get some before its gone!!!

You can check out the making of this card on my YouTube Channel here! If you landed here outside of the blog hop, here’s the hop list. Please check out all of the B|M Inspiration Team’s shaker cards!!! They are beautiful!!

Supplies List:

B|M Rose Garden Stamp

B|M Raven Detail Ink

Wagner Heat Tool

Stitched Rectangle Dies

B|M Clear Embossing Ink

Ranger Perfect Medium Brush Pen

B|M Foam Tape

Flat-Back Pearls

B|M Inspiration Box

B|M Alabaster Embossing Powder

B|M All-Purpose Craft Glue

B|M Botanical Banners Stamp Set

B|M Maple Surface Ink

B|M Released Heat-Resistant Vellum

Del & Artie on YouTube

Blog Hop List:

 HEATHER

MARIE

JESS

WALESKA

BERINA

LAUREN

DANIEL (you are here)

This big momma roll of foam tape comes in a pizza box to your door!!

This big momma roll of foam tape comes in a pizza box to your door!!

Brutus Monroe November Stamp Club Cards Blog Hop

Hey everyone!! How exciting to get my hands on my first Monthly Stamp Club stamp from Brutus Monroe. The November stamp celebrates the turkey for very obvious reasons. Our little guy, we’ll call him, Tom, wears a sign that says: Eat Ham! I found him endearing and playful.

I immediately thought of Tom’s pleading taking him on a campaign to save himself and maybe some others at the expense of the hogs on the farm. So I designed some cards showcasing this little turkey’s fight for survival.

My Post (22).jpg

Tom’s Campaign in America’s Classrooms

The first card I’ll show you has just one layer!! All the dimension comes from shading. I placed Tom in a classroom with a chalkboard and a pointer. I stamped Tom out on a piece of Bristol Smooth Cardstock using Brutus Monroe Raven Ink. Then I colored the turkey with a very realistic pallette. I used Arteza Real Brush Pens to color him in. I brought out a Tombow fineliner 0.5 mm marker and drew in a bamboo floor. I cut a rectangle out of some thick cardstock and used it to draw a frame around it for the chalkboard, using a gold chalk marker from American Crafts. I colored it in using a black chalk marker from the same company.

After the chalk marker dried, I took out a pig from the Hay Party Animals released by Hero Arts in July. I stamped him on the chalkboard using the Brutus Monroe Alabaster Pigment Ink. I fell in love with this pigment ink. It leaves a very bright and opaque white impression.

My Post (20).jpg

I grabbed the silver chalk marker from American Crafts and drew a straight line from Tom to the pig’s ham section (my grandma would call this his BOHUNKUS-hehehehe). Then i cut out a mask for Tom and the chalkboard and stamped a wallpaper pattern on the wall behind them using Brutus Monroe Aubergine Surface Ink. Its a lighter color here because I used second generation stamping for a more subtle look.

Tom’s Whirlwind Tour Poster

For my second card, we find Tom in a more abstract situation. Brutus Monroe produces an amazing set of designs for foiling, together with Thermoweb. Here I feature a Brutus Monroe Toner Sheet AND a Brutus Monroe DecoFoil Sheet! I cut down the large toner sheet into a card sized panel and ran it through my laminator with the foil sheet. I stamped a large splotch of Maple Surface Ink using the You Matter Stamp (which is no longer available) from Concord & 9th.

My Post (27).jpg

I stamped Tom’s image out on some Bristol Smooth Cardstock and colored him in with Arteza Real Brush Pens. I fussy cut him out and popped him up on some Foam Tape. I drew the word PLEASE on some vellum using a Ranger Lettering Pen which contains clear sticky ink. I heat embossed it using Brutus Monroe Raven Embossing Powder. I glued a piece of kraft cardstock behind it and popped it up on some foam tape. I cut a strip out of the same cardstock to make his handle. To add a thin border around the panel, I cut a piece of gold kraft cardstock from Tim Holtz and glued them down on a cardbase made from 110 Neenah Classic Crest cardstock using some Brutus Monroe Glue.

Did Tom’s campaign sway you toward a Honey Baked Ham for Thanksgiving? Please let me know in the comments below. Then head over to check out the next post in the hop from Heather

JESS

WALESKA

BERINA

LAUREN

MARIE

DANIEL (you are here)

HEATHER

Concord & 9th -- The Crafty Turnabout Bundle -- For all your crafty friend cards!

Hey everyone! Welcome to Del & Artie’s home online. Today I feature cards made using the Crafty Turnabout Bundle from Concord & 9th. I have enjoyed guest designing for one of my FAVORITE stamp companies the last four weeks. Let’s dive into this week’s offerings.

Stamp of Approval

First, up we have a shaker card. For the background, I stamped the turnabout four times in Brutus Monroe embossing ink and heat embossed it with Alabaster embossing powder. Then I blended some Wilted Violet and Picked Raspberry Distress Oxide Inks on top. I die cut the stamp and tiny heart images out of pink cardstock. Then I inked up the heart and bottom of the stamp with Wilted Violet DIstress Oxide Ink. I stamped the sentiment—You have my stamp of approval—onto some cardstock with embossing ink and heat embossed it with Alabaster Embossing Powder from Brutus Monroe. Then I inked up the square with some Picked Raspberry Distress Oxide Ink and attached them both along the bottom and left of the window.

I added a piece of acetate behind the window using some Brutus Monroe All-purpose Crafting Glue and popped up that panel on some foam tape. I dusted the acetate with some corn starch to prevent the shaker pieces from clinging to it once inside the card. I poured some bling into the center of an A2 card base made from Neenah Classic Crest 110lb cardstock. I adhered the foam taped backed panel over the mound of bling. As a final touch, I stamped the “stamp” sentiment all over the front of the panel with Brutus Monroe Clear Embossing Ink.

Adobe_Post_20181030_210402.jpg

You Color My Stamp

For the next card, I stamped the turnabout four times onto a panel using Stampin’ Up’s Eggplant Envy, Versafine Black Onyx ink, and Hickory Smoke and Mustard Seed Distress Oxide inks. I die cut a smaller center panel using the stamp die and stamped a sentiment on it. For this sentiment, I had to do some stamp surgery. I cut the “have” out of the “You have my” sentiment. Then I stamped the words YOU and MY around the world COLOR. I stamped the “STAMP” image below it. There’s a little CONFETTI stamp in the bundle that I used to stamp in some fun dots on this little rectangle panel in Mustard Seed DIstress Oxide Ink.

For the violet ribbon panel, I inked up a piece of white scrap cardstock with the Eggplant Envy ink. I adhered the center stamp panel onto the top of the ribbon panel and popped it all onto an A2 sized card base of Neenah Classic Crest 110lb cardstock with some foam tape to finish it off.

Adobe_Post_20181030_210507.jpg

Cut Out To Be Friends

For my last card, I stamped the turnabout stamp twice with some Tangerine and Rich Cocoa Memento Inks. Using the stamp die, I cut out three different colors of cardstock: white, brown and orange. I layered them together and stamped the front of the white one with the sentiment: We were cut out to be friends. The CUT OUT stamp is actually two stamps you can combine together using different colors (so fun). I also stamped the SEW stitched stamp for interest. Using the scissors dies, I cut out a pair of scissors using brown and yellow cardstock. I made a center ribbon stacking orange and brown cardstock together. I adhered the scissors to the center panel, and that to the center ribbon with foam tape. Then I glued it all on top of the turnabout panel. Finally, I glued it all onto an A2 sized card base made using Neenah Classic Crest 110lb cardstock.

What are you going to do with your Turnabout Bundle? I’d love to hear what your plans are or what you think of these creations in the comments below!

Links included in this post are affiliate links. You can use them at no additional cost to you and it helps to keep my blog alive for your enjoyment.

Thanks for stopping by today! I’d love you to visit Concord & 9th now to purchase this bundle.

Adobe_Post_20181030_210628.jpg

Owl Always Love a Costume Party

Welcome to Del & Artie’s portion of today’s blog hop! This is my first time participating in a blog hop and I’m wicked happy you’ve stopped in to see what I created for you this Halloween!

All week, I’ve been playing with the OWL LOVE YOU stamp set from Brutus Monroe. I wanted to work up to today using the stamp set in a very conventional way each day until Halloween rolled around. You can see the other cards I designed using this stamp set on my Instagram Feed: @delandartie. Here’s one just for reference:

Brutus Monroe 20181031.jpg

Today, the owls have spared no expense in their costumes, hiring a private makeup artist (Del) to create their disguises for them. On the left, we have a zombie and on the right we have a vampire. Zombies and Vampires make up the bulk of my horror film watching.

To create the zombie owl, I stamped the owl image using my Brutus Monroe Raven Ink pad onto a post-it note. I cut the left eye and a portion of the side of the owl out to make a mask. With the mask on some Bristol Smooth Cardstock, I stamped the image of the owls again and drew in the eye popped out eye and the side of the owl that had not been stamped, using a Copic Fine Liner .5mm pen. Then I drew the cape and fangs onto the other owl to make a vampire.

I took out my Arteza Real Brush Pens and colored in the zombie a with a few shades of green and a bit of brown, as well. For the vampire owl, I used a few shades of gray and made the cape red, with gray for shadowing. I fussy cut out the image and set it aside.

For the background, I took of piece of Bristol Smooth Cardstock, some Hickory Smoke and Black Soot Distress Oxide Inks and blended them together. I made sure to leave a white circle to make it appear that the moon had risen and these two were off to a Halloween Party. After blending in the moonlight, I took my Brutus Monroe Clouds Background Stamp and stamped it using the Black Soot Distress Oxide Ink.

I popped the owls up on to some foam tape for some dimension. I grabbed the Time Holtz Things/Talk stamp set and masked out the ‘hall’ in “Happy Halloween”. Then, I stamped in the word Owl from the Brutus Monroe stamp set and heat embossed it all with Brutus Monroe Alabaster Embossing Powder. I popped up the sentiment on some foam tape and mounted it under the owls.

Thanks for joining in today and for reading this step-by-step guide to making this terrific Halloween card. Please go shopping and use the affiliate links in this post to purchase the items for yourself!!

***GIVEAWAY!*** We wanted to have a little fun with our blog hop this week, and give away ONE $25 GIFT CERTIFICATE to the Brutus Monroe store! Just leave a comment on each blog post along the hop to be entered! Winner will be announced on next Wednesday's blog hop post, November 7th, on the Brutus Monroe blog. Please remember to check back next week to see if you are the winner! 

***BONUS ENTRY- Post ANY project you have created in the Brutus Monroe Fan Club group on Facebook with the hashtag, #TrickOrTreatGiveaway! Good luck!

Supplies List:

Owl Love You Stamp Set from Brutus Monroe

Clouds Background Stamp from Brutus Monroe

Brutus Monroe Alabaster White Embossing Powder

Brutus Monroe Raven Ink

Arteza Real Brush Pens 96 ct

Bristol Smooth Cardstock

Ranger Ink Blending Tool from Brutus Monroe

Tim Holtz Distress Oxide Inks at Scrapbook.com

Blog Hop List:

MARIE

JESS

HEATHER

BERINA

LAUREN

DANIEL (you are here)

SHARON

WALESKA

Concord & 9th All Season Turnabout Bundle & 2019 Calendar

Hello to all you Arties visiting my blog! Welcome! This week for Feature Friday over at Concord & 9th, I want to show you three cards I made using the All Season Turnabout Bundle and Calendar Pages. Supplies appear at the bottom of the page.

Happy Birthday To Me
Growing up in the Ozarks of southern Missouri, every year in mid-November, our schools let out for a week for my birthday… (ahem) …actually, they let out for deer season. I enjoyed a week away from school and took as a birthday vacation.

Concord & 9th’s 2019 Calendar goes perfectly with the All Season Turnabout Bundle—almost like C9 made them to go together. I chose my birth month to highlight a great masculine color combination using the mini turnabout stamp in this set. The inks come from Ranger’s Letter-It program: Cobalt, Coffee, Shadow Grey and Jet Black.

For turnabout stamps, I use the Precision Press Advanced tool from We R Memory Keepers. This took has an acrylic plate makes four turns exactly and has a preprinted grid, making it easy to line up the turnabout stamp in the center of the plate.

After stamping the turnabout onto a piece of Neenah Classic Crest 110lb cardstock, I die cut the stamped image out with the circle die included in the bundle. I used the banner die and cut the center out of the circle. On a piece of scrap cardstock, I stamped November with Jet Black ink and glued the circle onto it with the word showing clearly through the die cut in the center of the circle. Then I inked up some cardstock strips with the Ranger Letter-it Cobalt and Coffee Inks and adhered them to the calendar panel on both sides of the white strip.

I stamped a heart in the Shadow Grey ink right over my birthday — November 15 — hint hint. (I love receiving handmade cards from you all— you can send them to 89 Stansbury St, Providence, RI 02908).

In the photo, you can also see that I used the Easel Die to display this calendar panel. Let me know what you think about this card and if you’re planning on sending me a birthday card—I’d love to keep an eye out for it.

I listed supplies for all of these cards below.

Adobe_Post_20181024_104126.jpg

A Valentine for All Seasons
I know that Valentine’s Day comes along in four months, but the All Season Turnabout Bundle includes a tiny heart stamp AND a month of February comes in the calendar, so don’t blame me. I used the small stamps that accompany the turnabout bundle and made my out turnabout wreath with them. I stamped them using Distress Oxide Inks: Worn Lipstick, Cracked Pistacchio, and Evergreen Bough. I cut out the wreath using the circle die. I stamped the banner outline stamp in Evergreen Bough Distress Oxide Ink and the word February in the center of it. Then I used the banner die to cut it out and adhered it to the center of the wreath.

I finished off this calendar panel by stamping the 14th with the heart stamp in Worn Lipstick Distress Oxide Ink.

Adobe_Post_20181024_103538.jpg

Hello!

For my last card today, I wanted to highlight the ‘hello’ sentiment in the set. Its a handwritten script stamp and fits nicely into the center of the turnabout circle. I stamped the ‘hello’ sentiment onto a piece of cardstock using Brutus Monroe Embossing Ink and I heat embossed it using the Brutus Monroe Penny embossing powder. That penny colored embossing pairs well with the Ranger Letter-It Ink combo I used for the turnabout center: Olive, Rose Madder, French Ultramarine and Plum. On the panel, I stamped the turnabout all over the front in Brutus Monroe Embossing Ink to make a matching watermark in the background.

Thank you for stopping by today and if you’d like to purchase this stamp and die bundle from Concord & 9th or any of the supplies I used for this project, please click on the links below. Big hugs to all of you!

Adobe_Post_20181024_103048.jpg

If you want to purchase supplies to make these cards yourself, please use these affiliate links, at no additional cost to you.

Concord & 9th Full October 2018 Release (from Concord & 9th)

Distress Oxide Inks (from Amazon)

Brutus Monroe Embossing Ink (brutusmonroe)

Brutus Monroe Penny Embossing Powder (brutusmonroe)

Ranger Letter It Ink 4-pack Set 1 (scrapbook)

Ranger Letter It Ink 4-pack Set 2

Neenah Classic Crest 110 lb card stock (from Amazon)

Tonic Studios Tim Holtz Glass Mat (from Scrapbook)

Tonic Studios Tim Holtz Mini Trimmer (from Scrapbook)

Precision Advance Press by We R Memory Keepers (from Scrapbook)

Janet's Revenge -- Pretty Mean Collection with Hero Arts My Monthly Hero Card Kit

The saga continues!! Janet, enfuriated but calculating in our last episode, lured her brother back to the ice and then to the slopes for some sledding on Mt Washington in New Hampshire. It only took a moment of carelessness on Jesse’s part to find himself wrapped in a bungee cord Janet found in her father’s trunk. She dragged him through the snow to a sled she had waiting at the top of the slope, tied the cord to her ride and pushed off down the mountain.

Jesse could only think of how he should have never fallen for Janet’s kindness so soon after having pushed her into the ice. In his panic he raised his hand to his ear to call Mom and Dad to the rescue, only remembering to his horror, they had just grounded him from his phone that week. He found himself alone, with his vengeful sister, his yells equaled in strength by her gleeful and maddening song: FA LA LA LA LA LA LA LA!!!

Thanks to everyone who hung out with me on YouTube last night. You all rock!! If you didn’t get a chance to see the live making of this epic revenge card, please take a moment to play it on 2x the speed (like I do). I have added the video below for your convenience. Please do not forget to subscribe and give the video a thumbs-up if you like it. I don’t mind thumbs-down either, just comment either way!!

A giveaway of this kit will take place on my Instagram feed, here on my blog and on my YouTube Channel this week. Keep your eyes open for the details. You can get a head start by commenting on this blog post. (hint hint).

20181020_084316-01.jpeg
20181015_072544-01.jpeg
20181017_115725-01.jpeg

Concord & 9th Notable Numbers Bundle Four Ways

Hello to all you Arties visiting my blog! Welcome! This week for Feature Friday over at Concord & 9th, I want to show you four cards I made using the Notable Numbers Bundle. Supplies appear at the bottom of the page.

Happy Birthday Sis
The month of October brings us fall leaves, goblins and ghouls, but it also brought me my little sister. She turns 41 this year. Since I love her to death and I love to make her laugh, I made a cheeky card for her birthday. She doesn’t look a day older than 41.

For this card, I cut out a stencil using the larger rectangular die. Then, using the 4 and 1 dies, I cut masks out of a post-it note and attached them both to a piece of Bristol Smooth card stock with painters tape. I blended Salty Ocean and Twisted Citron Distress Oxide Inks over the tops of the stencil and masks. After removing my stencil and masks, I stamped the numbers, 4 and 1, in Salty Ocean Distress Oxide Ink. Then I stamped the sentiment with Simon Says Stamp Clear Embossing Ink and heat embossed it with white embossing powder. I replaced the masks over the numbers and stamped the larger rectangular frame stamp over it all in Twisted Citron Distress Oxide Ink. I trimmed the panel down to leave a thin border around the frame stamp.

Then I grabbed the Sketched Stripes Background Stamp from Concord & 9th and stamped the card base with Twisted Citron Distress Oxide Ink. I added some foam tape to the back of the panel and adhered it to the stamped card base.

Happy Birthday Paula!!

I listed supplies for all of these cards below.

C9 Notable Numbers 3.jpg

Three Cheers
For the second card, I used Neenah Desert Storm Card Stock, Rich Cocoa Dye Ink from Memento, Blue Cardstock from Michaels and confetti pieces from the All Season Turnabout Stamp Set. I stamped the card base with the same Sketched Stripes Background Stamp, this time in Tumbled Glass Distress Oxide Ink. Then I die cut the number three, twelve times and stacked them up four high. I stamped the top three on each stack with Rich Cocoa Ink from Memento. I stamped the word CHEERS on some blue card stock and cut out a banner by hand. Then I die cut a banner from the All Season Turnabout Bundle and stamped it with the word YEARS. I colored the confetti sprigs with Rich Cocoa Ink and embellished the card with them.

C9 Notable Numbers 1.jpg

5 Minute Birthday Card

Next up, I made a 5-minute birthday card using some dark blue card stock, and an inset die cut technique. I heat embossed the words CHEERS, TO and YEARS, in Ranger Gold Embossing Powder. Then I die cut the 3 and the 0 out of the panel. I die cut the 3 and the 0 out of a piece of Neenah Classic Crest paper and stamped it in Mustard Ink from Stampin’ Up. The Notable Numbers Bundle can really make an good impression in very little time.

C9 Notable Numbers 2.jpg

Pinky Shake
Finally, for my last project, I did a shaker card for a five year old. I stamped the frame in clear embossing ink on Cotton Candy Card Stock from Simon Says Stamp and heat embossed it with gold embossing powder. I die cut the inside of the frame with the large rectangular die. Then I adhered some an acetate panel to the back of the window. I stamped the card base with HAPPY 5TH BIRTHDAY and heat embossed it. Then I used a blending tool and applied some Spun Sugar Distress Oxide Ink partially up the card base. I added to the window two layers of double-sided foam tape and lightly dusted the acetate with some corn starch to remove static.

For the shaker pieces, instead of sequins, I used the All Seasons Die and some Copper and Tutu Glitter Paper from the Concord & 9th Summer Glitter Pack to make confetti pieces. I put them loosely in the center of the card base and mounted the window onto the front of the card.

I hope you enjoyed these cards as much as I did — now go grab this bundle from Concord & 9th today.

C9 Notable Numbers 4.jpg
C9 Notable Numbers 4b.jpg

If you want to purchase supplies to make these cards yourself, please use these affiliate links, at no additional cost to you.

Concord & 9th Full October 2018 Release (from Concord & 9th)

Distress Oxide Inks (from Amazon)

Concord & 9th Summer Glitter Pack (concord&9th)

Brutus Monroe Raven Black Embossing Powder (brutusmonroe)

Neenah Classic Crest 110 lb card stock (from Amazon)

Tonic Studios Tim Holtz Glass Mat (from Scrapbook)

Tonic Studios Tim Holtz Mini Trimmer (from Scrapbook)

Versafine Onyx Black Ink (from Scrapbook)

Neenah Desert Storm Cardstock (from Amazon)

Pretty Mean Collection with Hero Arts My Monthly Hero Card Kit

Those of you who hang out with me on Instagram (@delandartie) know I really enjoy having fun with my stamps in unexpected ways. This month, the Hero Arts My Monthly Hero Card Kit includes some amazing images that lend themselves to mischief.

In this series of cards, you will meet two siblings, Jesse and Janet. They really do love each other, almost as much as they despise each other (did you experience this among your siblings?) In my first card, Jesse and Janet had taken on the task of decorating the outside Christmas tree, on orders from Mom and Dad. Instead they took off to play with their friends. The neighborhood fauna got involved and the raccoon ruined the lights.

20181010_125955-01.jpeg

When Mom and Dad found the lights a mess and unusable, Janet blamed Jesse. She got away scot-free and her parents grounded Jesse from his phone for a week.

Of course this didn’t sit well with the lad, so he decided to get his revenge that evening when their parents took them ice skating at the city park. The sign near the ice warned skaters of a recent warmup and thinning of the ice.

Jesse shoved his sister and she fell right in the icy waters. Her mom and dad did not see it happen, but heard Jesse cry for help. They rushed to the icy edge and pulled Janet to safety.

20181015_072544-01.jpeg

Just days after the thin ice scandal, Jesse and Janet head out to downcity Providence to skate around the city Christmas tree. It appears that all is well, but it’s not over yet. Janet seems to have forgiven Jesse his merciless shove into the icy waters. But alas, this harmony is only surface deep.

20181017_115725-01.jpeg

Stay tuned for the next installment of the story: Janet’s Revenge. It involves a sled, a slope and the mangled Christmas tree lights the raccoon left behind!

Please use my affiliate links below to help me continue to bring great content at no additional cost to you.

Supplies list:

Hero Art My Monthly Hero Card Kit (heroarts)

Arteza Real Brush Pens (amazon)

Bristol Smooth Paper (amazon)

Versafine Black Onyx Ink

Tim Holtz Mini Trimmer by Tonic Studios (amazon)

Tim Holtz Glass Mat by Tonic Studios (amazon)

Gold Sequins (amazon)

Micron 6-pc Black Ink Set (scrapbook)

Brutus Monroe Alabaster Ultra White Embossing Powder (brutusmonroe)

Brutus Monroe Foam Tape (brutusmonroe)

Catherine Pooler Inks (catherinepooler)

Contact Paper for the background in the photo

Concord & 9th Songbird Stamp Set Four Ways

Hello to all you Arties visiting my blog! I hope your day has brought you a fresh load of creative passion. How great to have you stop by. Angie, from Concord & 9th, wrote me a few weeks ago to ask if I would like to guest design for this month’s release. I played it cool, but on the inside I nearly burst with excitement.

When the full release came in the mail, I just could not wait to get started with it. Each stamp set from Concord & 9th brims with well-thought out and open-ended designs, so possibilities never end. Plus, they make the stamps with high-quality photopolymer, so they stand up to a good stamping and lay down an even image.

This week, I want to show you four cards I made using the Songbird stamp set. Supplies appear at the bottom of the page. (I may use affiliate links at no additional cost to you.)

Missing You
The first card, Missing You, features a songbird colored like the state bird of Missouri, the Eastern Bluebird. Originally from Missouri, I now live a world away in Rhode Island, so my “Missing You” goes out to my beautiful home.

I stamped the images of the songbird, branch and leaves in Copic friendly Memento Rich Cocoa Ink on Neenah Classic Crest 110lb cardstock. Then I colored them in using Copic markers: (Bird — Blues: B29, B04, B45, B41, Orange/Yellow: YR04, YR31, E08, Y28 Gray: N04. Branch — Gray N04 Leaves: G29, G07, E39, Y28, YG17)

I stamped the sentiment, Missing You, from the Songbird stamp set. Then, I colored the edges of another panel of cardstock, cut just a bit larger than the main panel, with a B29 Copic marker. I layered them all together and that finished off the first card.

C9 4 final.jpg

You Make My Heart Sing
For the second card, I stamped a 4.25 x 5.5 piece of Strathmore Cold Press watercolor with clear embossing ink and white heat embossed the image of the bird and branch. Then, using my Arteza Real Brush Pens, I began to add layers of color by adding swatches of watercolor ink and blending them in, drying them with a heat gun and repeating the process with different colors. I added a sentiment on vellum with silver heat embossing, adhered them all together with some liquid adhesive and attached it to a Neenah Classic Crest White card base.

C9 1 final.jpg

You’re In My Thoughts
Next up, another Arteza Real Brush Pens card with a monochromatic palette. I layered several different shades of black and gray and then stamped the image of the songbird and branch on top. Then, I added some shading to the image with an Arteza pen and blended it out with the water pen Arteza includes in their set. The sentiment, “You’re in My Thoughts,” comes from the same stamp set.

C9 3 final.jpg

You Are Wonderful
Finally, for my last project, I did a five-minute card, stamping the songbird and branch image along with some pine needles and a pine cone on some Neenah Desert Storm card stock with Versafine Onyx Black Ink. Then I stamp the bird’s head and beak on some scrap paper and cut it out to make a mask for the berries. I stamped the berries and colored them in with Arteza Real Brush Pens in three shades of red. The sentiment, “You Are Wonderful,” comes from the same Songbird stamp set.

C9 2 final.jpg

I hope you have enjoyed these cards! If you want to purchase supplies to make these cards yourself, please use the affiliate links, at no additional cost to you.

Concord & 9th Songbird Stamp Set (from Concord & 9th)

Concord & 9th Full October 2018 Release (from Concord & 9th)

Arteza Real Brush Pens 96 Count (from Amazon)

Neenah Classic Crest 110 lb card stock (from Amazon)

Tonic Studios Tim Holtz Glass Mat (from Scrapbook)

Tonic Studios Tim Holtz Mini Trimmer (from Scrapbook)

Versafine Onyx Black Ink (from Scrapbook)

Neenah Desert Storm Cardstock (from Amazon)

Vellum Cardstock (from Scrapbook)

Copic Sketch Markers (from Amazon)

Copic Sketch Markers (from Blick)

Craft with Me Live Video: Simon Says Stamp Fun and Festive Release

Watercoloring the Winter Scene Stamp set from Simon Says Stamp with Arteza Real Brush Pens.

Hello Arties! What a treat I received in the mail today from Simon Says Stamp. As part of the SSS Designer Family, I have the joy of playing with a part of the monthly release ahead of its debut. I started this month and my stamp set arrived a little late for the release party, so I decided to do a live with you.

I prefer to watch live video replays in 2x the speed, since they tend to be longer. You will see me learning how to use these pens and interacting with viewers as I go along. I have only used these pens for a few days now, so enjoy watching the struggle.

I have listed below, the supplies that I used to create this card. Thank you for shopping through these links. It helps to support my channel at no additional cost to you.

Thank you for stopping by and have a super day!

Simon Says Stamp Fun and Festive Release October 2018

Arteza Real Brush Pens 96 Count (from Amazon)

Tonic Studios Tim Holtz Glass Mat (from Scrapbook)

Tonic Studios Tim Holtz Mini Trimmer (from Scrapbook)

Copic Multiliner 0.5 mm (from Amazon)

Versafine Onyx Black Ink (from Scrapbook)

Simon Says Stamp Clear Embossing and Watermark Ink (SSS)

Strathmore Watercolor Paper (from Scrapbook)

Video Block
Double-click here to add a video by URL or embed code. Learn more

One Layer Card Panel Using the My Monthly Hero Card Kit

Hello all of you Arties! Welcome to my first “My Monthly Hero Card Kit” blog post. Yesterday, I hosted a Craft with Me Live video on Instagram where I masked off some images from the kit and made a scene with the animals in the stamp set. How fun to have Gina from Gina K Designs and Catherine from Catherine Pooler Designs drop in while we all chatted and broke in the kit!

To start, I cut down a sheet of Neenah Classic Crest 110 lb cardstock to a quarter panel. And after deciding which animals would go where, I began stamping with the dog, cat and mouse trio stamp. Then, using a die from the kit, I made a mask, covered the trio and stamped the tree over them. The raccoon came next and we didn’t need a mask for him (he already had one — hehehe — okay that was corny). Finally, we masked the tree off and stamped in the deer behind it.

I colored in the boughs of the tree with my Seaweed Green Arteza Real Brush Pen and the trunk with the Chocolate Arteza. I continued coloring in the animals one by one until they were finished. Finally, I heat embossed some ornaments onto the tree and added a bench on the far side of the raccoon image. I added a shadow to each of the images with Gray Smoke Arteza and stamped a sentiment from the kit.

I had a blast making this card with you all. Please go shopping for supplies using my links below. This way, you help support my art and all at no additional cost to you.

I hope you enjoy a fun-filled day, my friends.

20181010_125955-01.jpeg

Copic Coloring a Digistamp from CopicAddicted

<iframe width="560" height="315" src="https://www.youtube.com/embed/CEatF45LRo8" frameborder="0" allow="autoplay; encrypted-media" allowfullscreen></iframe>

Read more