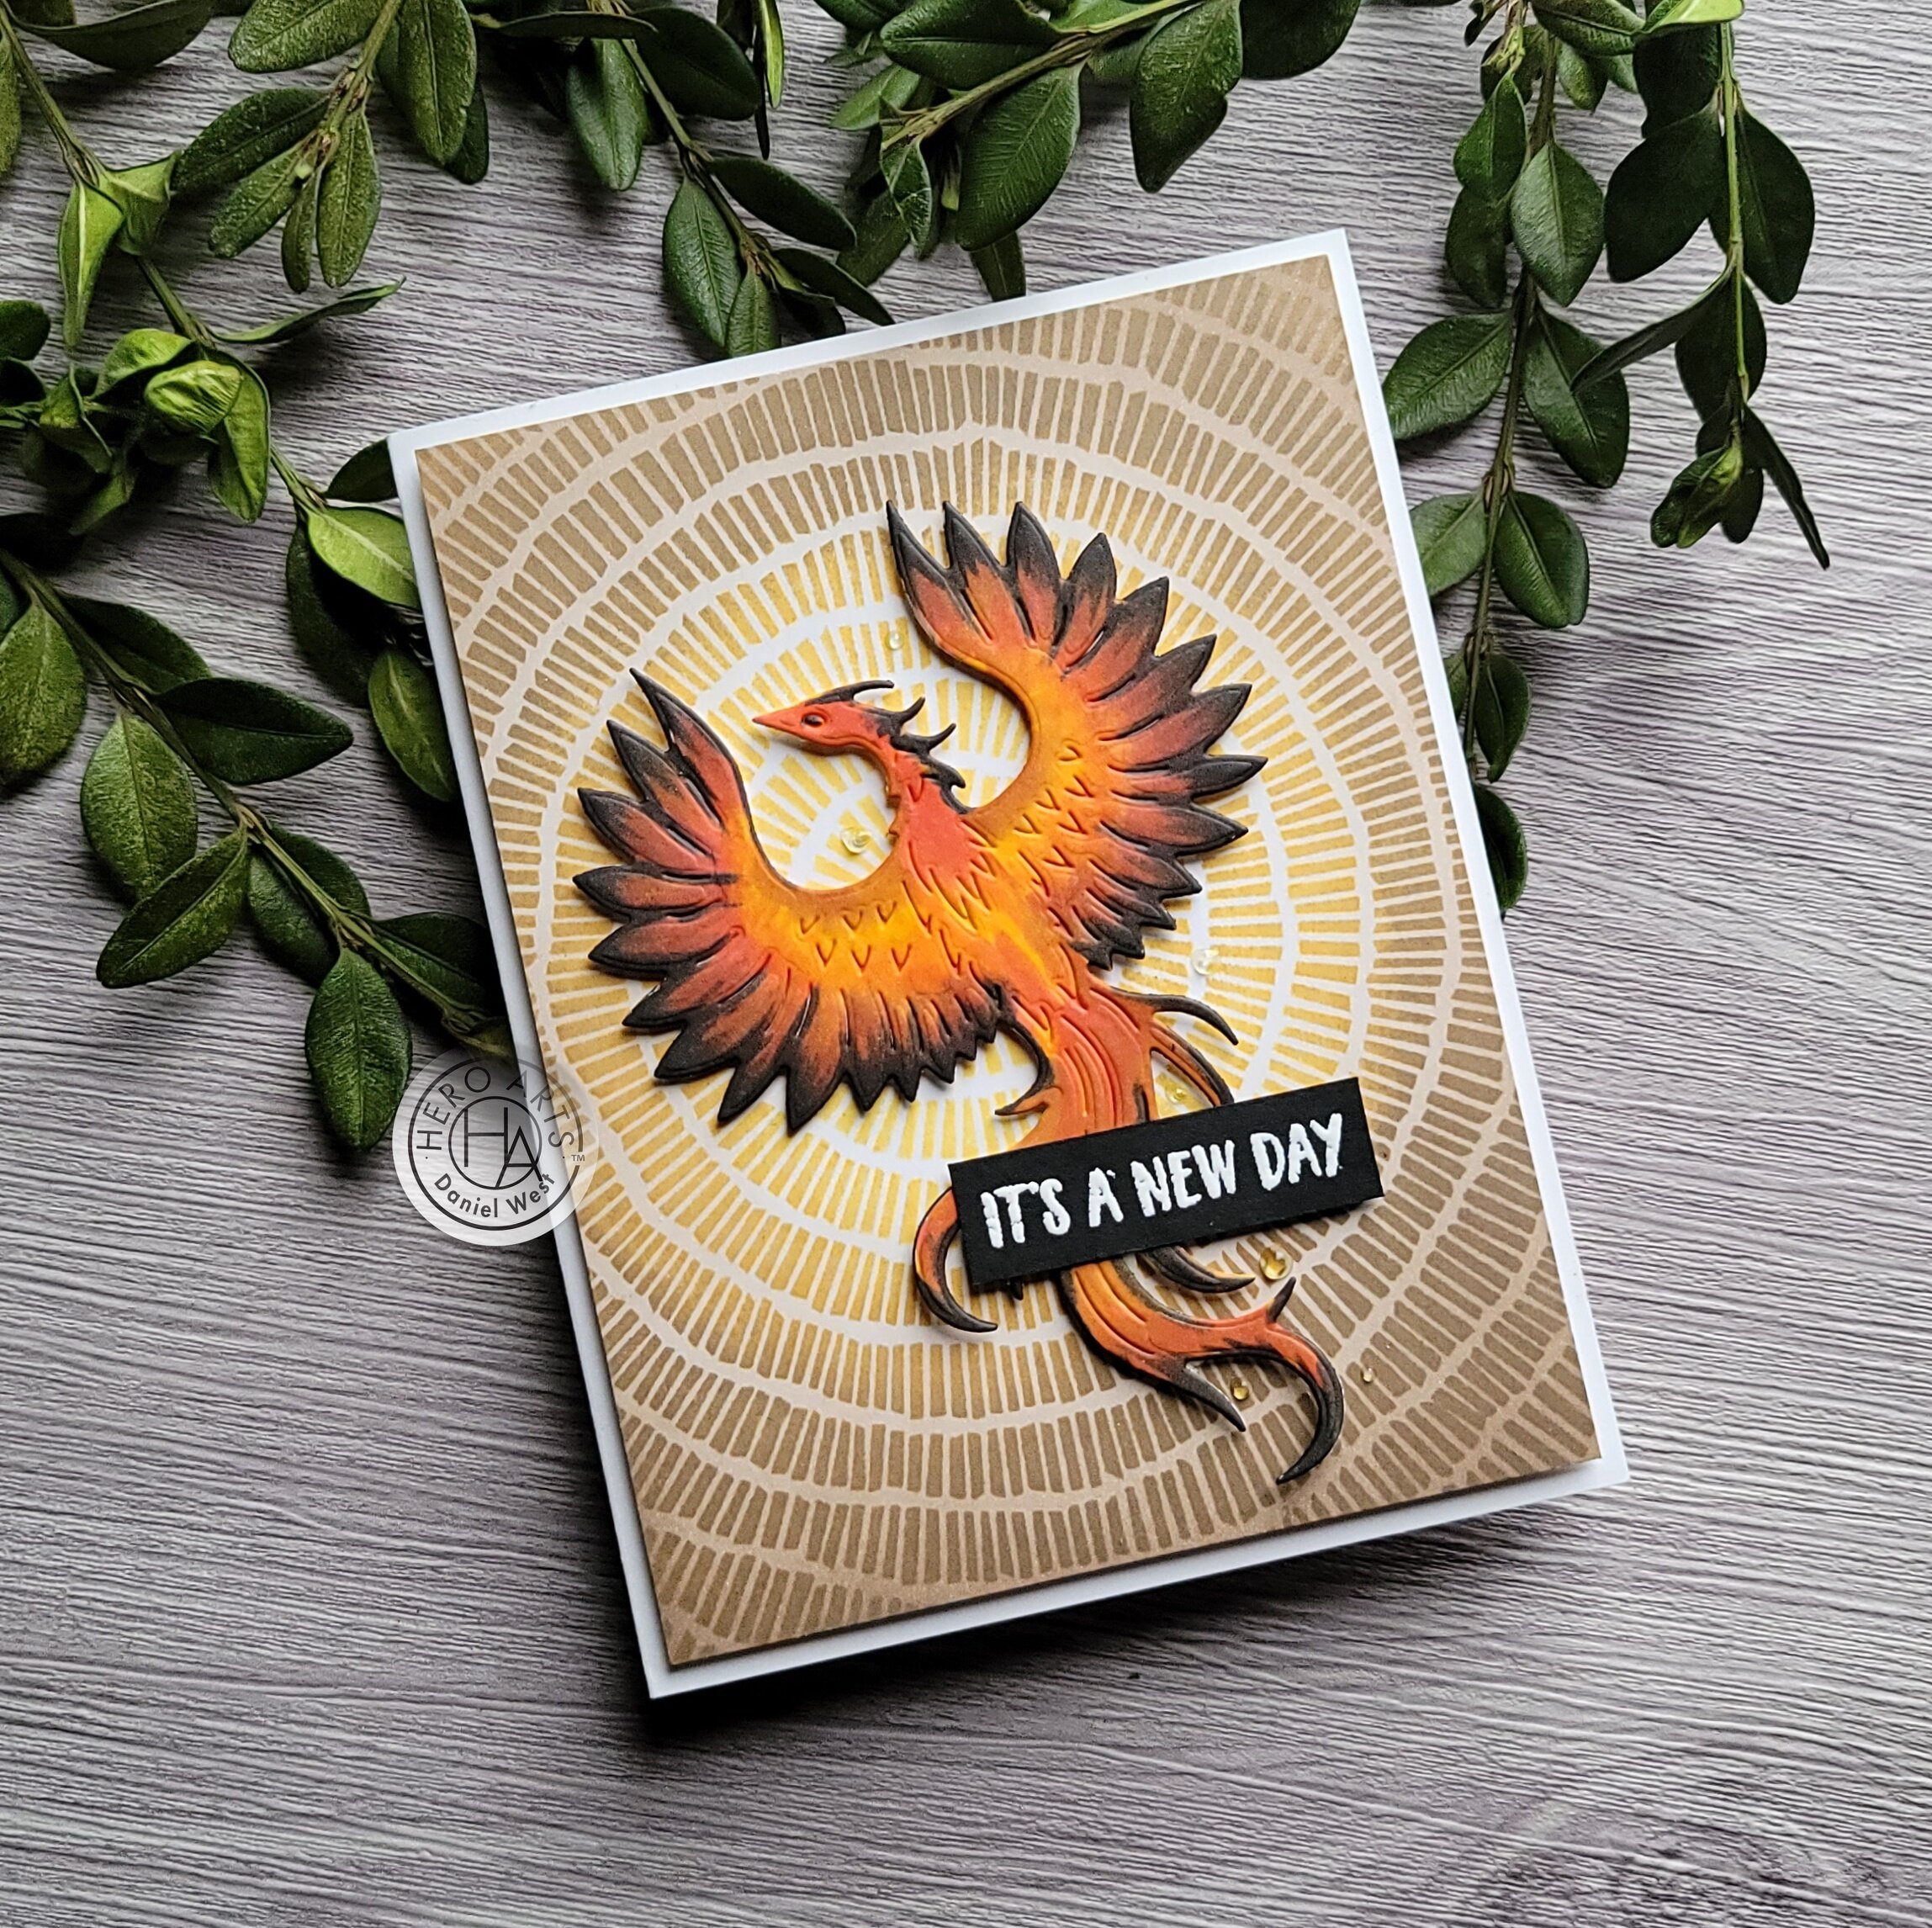
Hey there my friends!! This new year feels like a new beginning for many of us. The phoenix bird is legendary and includes a myth that it was destroyed by fire, yet rose from the ashes. It’s a commentary on the hopes of each of us when we have gone through a struggle, that a new day can bring us new opportunities and new courage to fight on.
I created this card in that spirit. It has a very masculine feel, yet could be given to any one. You could switch out the colors and make it more feminine. Here are all the deets.
Technique: Masculine Color Palette and Die Element
Supplies List
Circular Grid Bold Prints (coming in February 2021, Spring Catalog p 84)
Copic Markers in Yellow, Red, Yellow-Red and Warm Gray
Steps to Create this Card
I started out by stamping the Circular Grid Bold Prints out in Butter Bar ink and Cup O’ Joe Ink, blending them right on the stamp with a blender brush between layers.
Then, I added more Cup O’ Joe Ink to create a vignette with a blender brush.
Next, I die cut the Phoenix Bird die out of Dove white cardstock with my Gemini Jr and colored it in with Copic markers — W10, YR27, Y17 and R17.
After that, I popped up the Phoenix Bird onto the front of the background panel with foam tape.
Then, I created a sentiment strip by stamping “It’s a New Day” from the Zest Wishes stamp set onto some Pitch Black cardstock in Clear Watermark and Embossing Ink and melting White Embossing Powder over it, and trimming it down.
I adhered the sentiment strip to the front of the panel, trimmed the panel down an 1/8” on all sides and popped it all up on fun foam with liquid adhesive.
To finish it all off, I added some drops of Glossy Accents around the Phoenix!
I really appreciate you stopping by for this Phoenix Bird card. If you feel like you wanna shop and you have received some value from this blog post, please consider using my paid affiliate links in the grid below (or throughout this post). I will receive a small portion of your purchase total at no additional cost to you. For the links to work, please allow cookies on your browser when asked.
Let me know if you have any questions. You can ask in the comments section below or reply to the e-mail this post is sent in!
Love you all!

|